How to Receive and Copy Email Verification Codes with OTP Inbox
By OTPINB Team · Published 2026-11-03 · Reviewed 2026-11-03
To receive an email verification code, create a mailbox first, copy its exact address into the sending service, and then read the incoming message. When Quick Inbox recognizes a supported code format, it displays the candidate separately so you can select and copy it.
A detected number still needs a context check. Match it to the sender and your current request before using it. Public inboxes are suitable only for messages that can safely be read by someone who knows the address.
1. Create the mailbox before requesting a code
Open the mailbox creation view, generate or enter a name, choose an available domain and complete any verification required. Use the action that creates the email address and confirm the result.
Generating a name only fills the name field. It does not by itself create an address or tell the sender where to deliver mail.
Copy the complete address from the successful result. Check both sides of the @ sign. Do not reuse an address from an old test unless you have confirmed it is still the mailbox you intend to read.
2. Request the message from the sending service
Enter that full address where the service asks for an email, provided the service permits temporary addresses. Submit its verification request once and check for an error or notice.
OTP Inbox cannot make a website accept a particular domain. If the service requires a permanent address, use one you control instead of repeatedly changing temporary domains.
When testing your own application, use fictional accounts and a message that contains no sensitive data. The recipient and message content should be safe to include in a test report.
3. Read the existing public mailbox
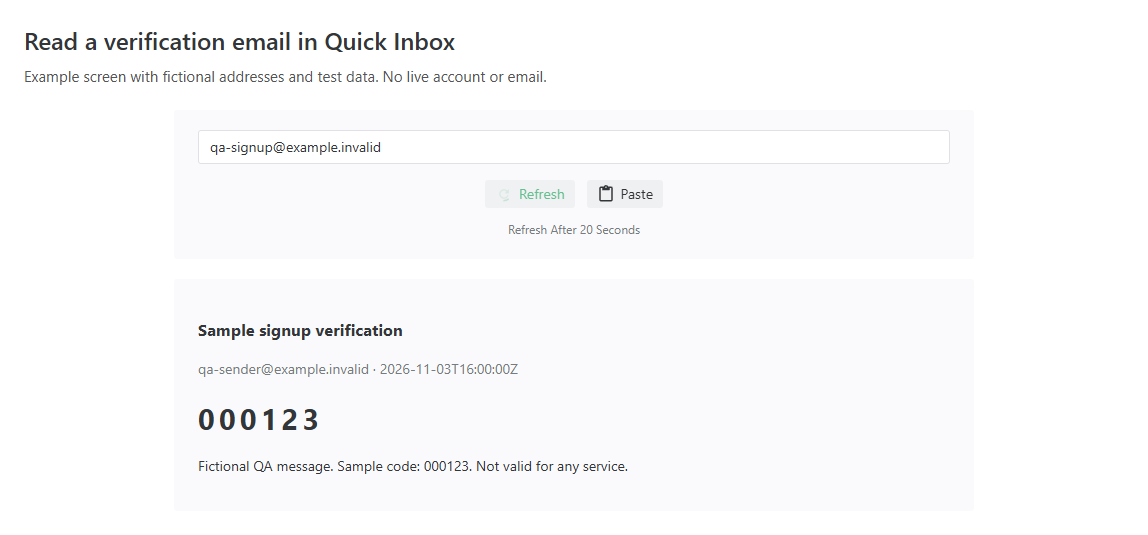
In Quick Inbox, paste the full address into the lookup field and start the lookup using the displayed control. The interface waits for incoming mail and shows the messages it finds. A lookup does not create a missing address.
When a message arrives, match its sender, recipient and timing to the request you just made. If you are managing several mailboxes, confirm the selected address before copying anything.
For a missing message, follow the delivery troubleshooting checklist before requesting repeated resends.
4. Check the message before copying the code
An email can contain several numbers: a verification code, an order reference, a date or a customer identifier. An extracted number may be useful, but the message explains which action it belongs to.
In Quick Inbox, select the displayed code and use your browser or device's copy action. The Paste button above the mailbox field pastes an address; it does not copy the code. If the sender uses a confirmation link instead of digits, follow that service's instructions after checking the destination and context.
Do not paste an unfamiliar link into a support conversation or publish a screenshot of it. A link can carry access information even when no numeric code is visible.
5. Use the correct request when resending
Requesting a new code may change which code the sender accepts. Keep the newest request and its corresponding message together rather than choosing whichever message arrives last.
Delivery order and request order can differ. For an application you control, include a non-sensitive request label in the test message or your private test notes. That makes it easier to distinguish the first request from a resend without exposing a real code.
The sender decides validity, expiry and reuse rules. OTP Inbox does not extend a code's lifetime by keeping the email visible.
What to do when the result is unclear
| Result | Next action |
|---|---|
| No email appears | Confirm creation, exact recipient and sender delivery status |
| Email appears but no code is extracted | Read it for an unsupported format or a confirmation link |
| Several numbers are visible | Identify the one the sender labels for the current action |
| Code is rejected | Check the matching request and the sender's expiry/resend rules |
| Clipboard action fails | Copy manually; keep the code out of support messages |
Buying Credits will not make a missing incoming message arrive. Receiving mail does not spend sending Credits.
Keep the test low-risk
Anyone with the full public address can read its mail, including mail in newly created Premium inboxes. Do not use this workflow for an important account's recovery channel.
For several authorized test scenarios, read how to organize multiple inboxes. Otherwise, open OTP Inbox, create one address and verify the complete flow before adding more.